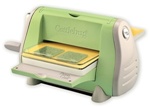
Thanks to Cazzy for doing this fab tutorial for us
The Making Memories Ribbon Tag Curler.
This is a tool you don’t often hear about but I came across on an American site while searching for something else, and just had to try it! It is a joy to use and adds something special to your projects.
The tool comes in a soft black drawstring bag, with full instructions that I have to look at each time to remind myself which way round the tag goes!
Making Memories Tag Curler in its own bag.

The tool folds down and clips together for storage

and opens when you want to use it.

To add a tag to a ribbon you first put the tag in the curler, point facing the M.

Then you thread your ribbon through your project, and place both ends across the tag in the Tag Curler.

Squeeze the Tag Curler handles together and your tag is attached but make sure it is going to end up the right way round before squeezing!

Ribbon with finished tag.
Tags are available in silver metal as shown with packs of several different sentiments or cut out shapes - I used a “Happy Birthday” tag on this card. You can also buy enamelled tags to use with this tool.
You can get this tool in the U.K. now and I sure it is going to be popular.
I found it here:
http://www.scraprevolution.co.uk/home.php?printable=Y&cat=114
http://www.beecrafty.net/tools__equipment.htm
Thank you again Cazzy and I hope you enjoy your first craft tool tutorial everyone
The Making Memories Ribbon Tag Curler.
This is a tool you don’t often hear about but I came across on an American site while searching for something else, and just had to try it! It is a joy to use and adds something special to your projects.
The tool comes in a soft black drawstring bag, with full instructions that I have to look at each time to remind myself which way round the tag goes!
Making Memories Tag Curler in its own bag.

The tool folds down and clips together for storage

and opens when you want to use it.

To add a tag to a ribbon you first put the tag in the curler, point facing the M.

Then you thread your ribbon through your project, and place both ends across the tag in the Tag Curler.

Squeeze the Tag Curler handles together and your tag is attached but make sure it is going to end up the right way round before squeezing!

Ribbon with finished tag.
Tags are available in silver metal as shown with packs of several different sentiments or cut out shapes - I used a “Happy Birthday” tag on this card. You can also buy enamelled tags to use with this tool.
You can get this tool in the U.K. now and I sure it is going to be popular.
I found it here:
http://www.scraprevolution.co.uk/home.php?printable=Y&cat=114
http://www.beecrafty.net/tools__equipment.htm
Thank you again Cazzy and I hope you enjoy your first craft tool tutorial everyone
Last edited by Quirky Boots on Wed Dec 30, 2009 1:41 am; edited 1 time in total

 Home
Home


